
Creating and Editing Virtual Machines
On the Virtual Machine tab, click the + button in the lower-right corner to create a new Virtual Machine; on a Virtual Machine's detail page, click Edit to modify an existing one (editing is only possible while it is stopped).
The configuration interface is divided into 5 swipeable tabs: Basics / Boot / Display / Storage / Network. The button at the bottom is used to save; on save, each tab is validated in turn, and if there is an error the interface automatically jumps to the first tab with a problem.
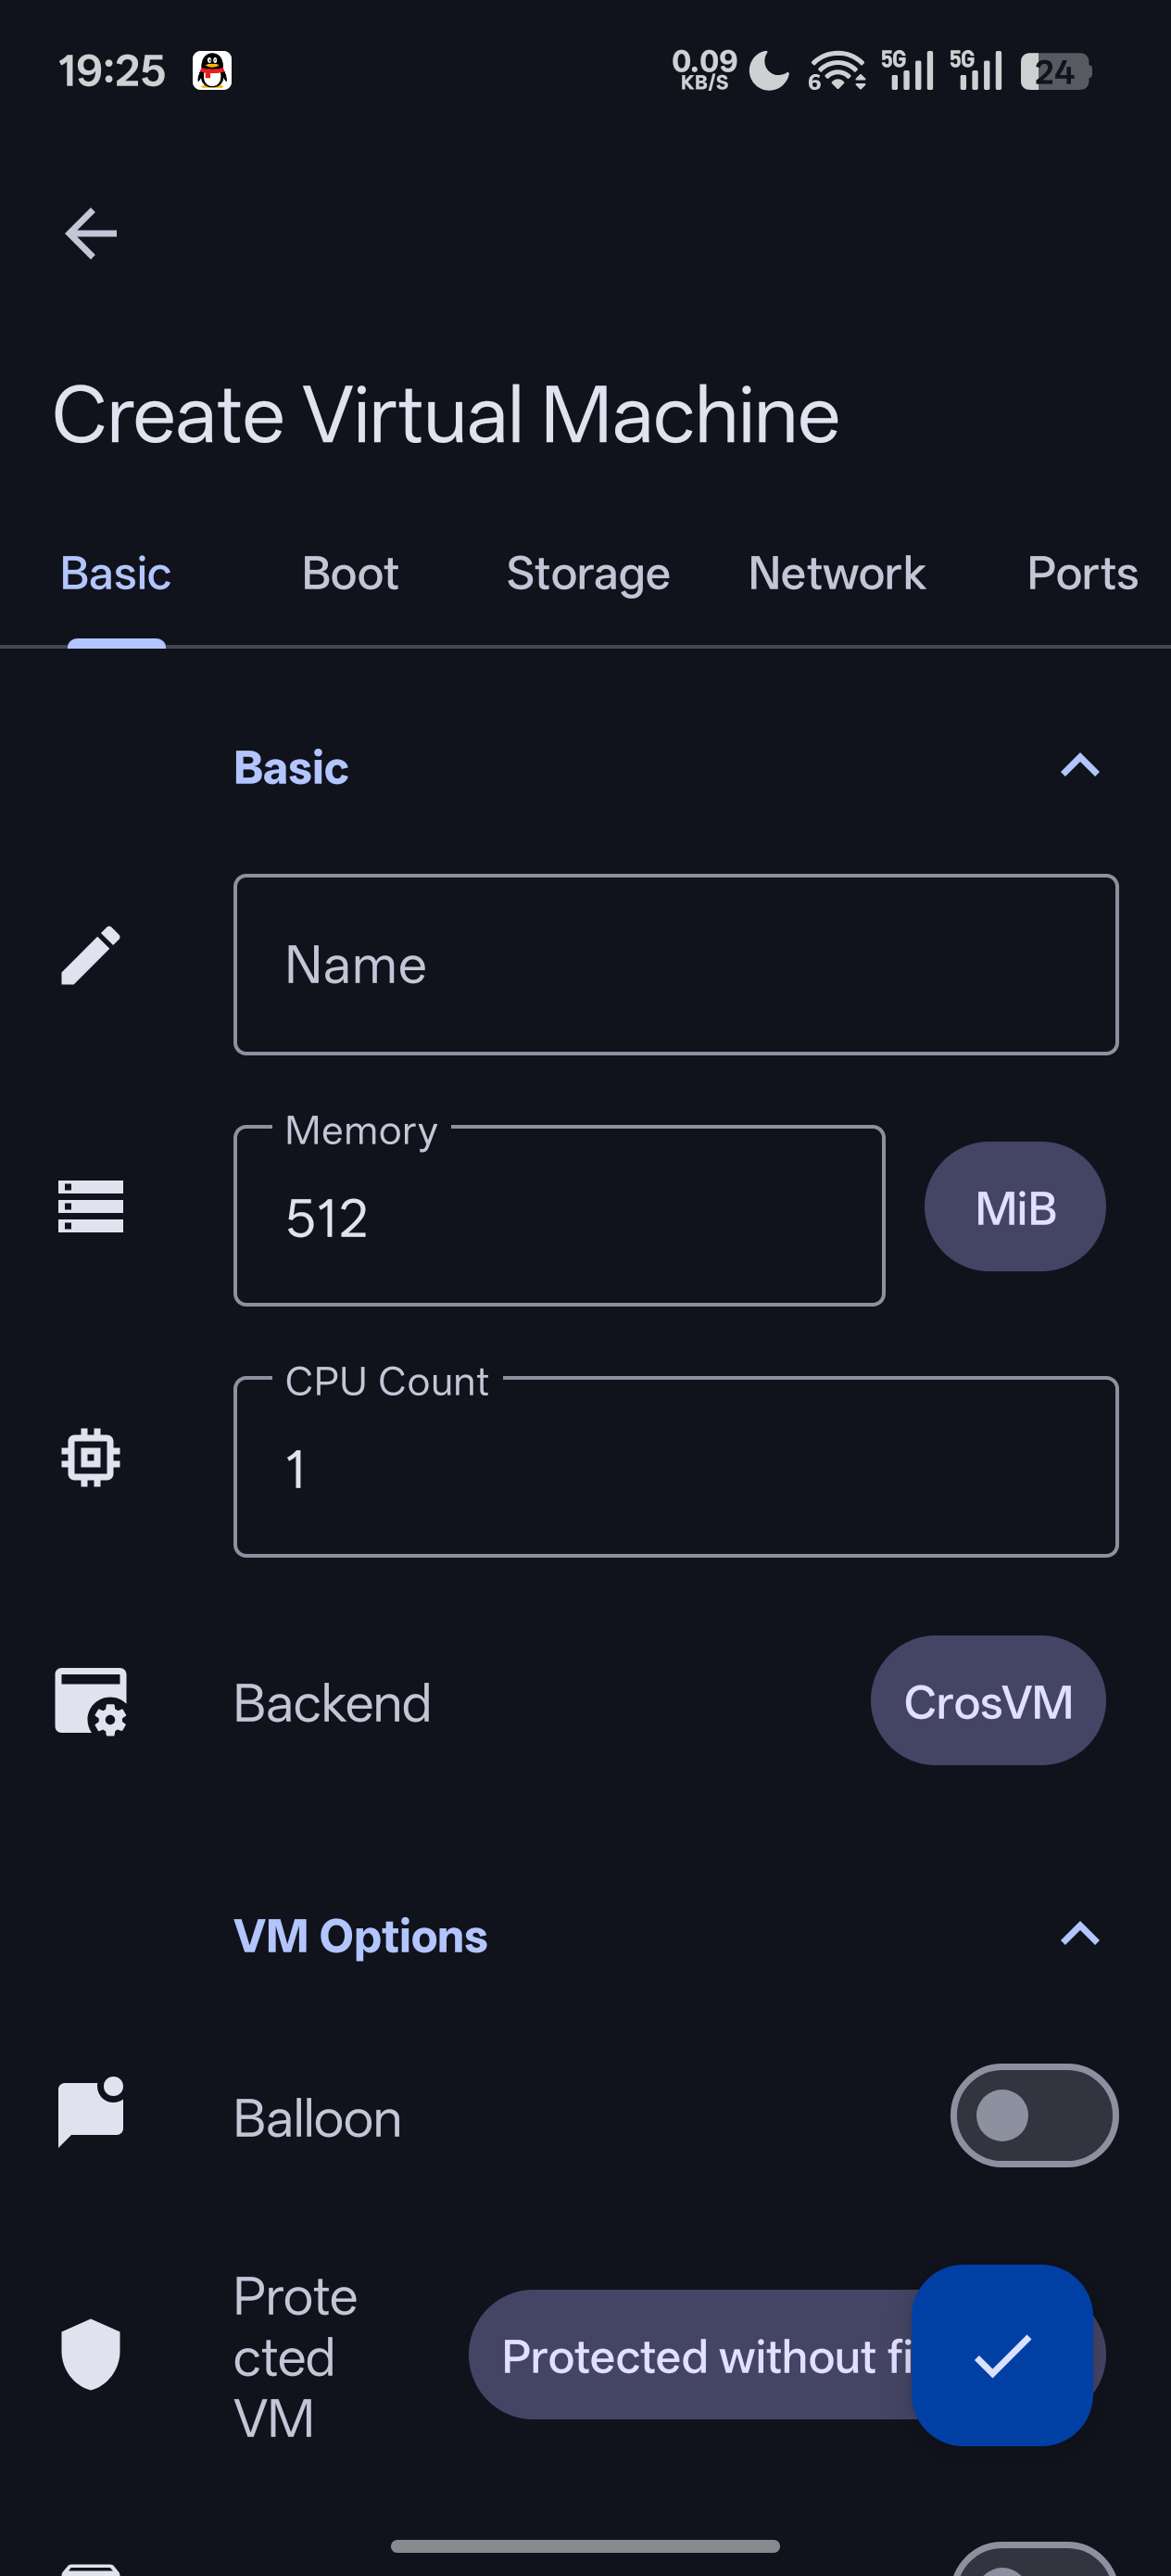
📷 Screenshot placeholder: Create/Edit Virtual Machine - tab overview
Tab 1 · Basics
| Field | Meaning | Default / Options |
|---|---|---|
| Name | Virtual Machine name; must be unique and a valid file name | Required |
| Memory | Memory size (unit selectable, ultimately stored in MB) | 512 MB |
| CPU count | Number of vCPUs | 1 |
| SWIOTLB size | SWIOTLB buffer used in Protected Mode | 64 MB |
| Memory balloon | virtio-balloon dynamic memory reclamation | Off |
| PMU | Performance Monitoring Unit | Off |
| RNG | Random number generator | Off |
| SMT | Simultaneous multithreading | Off |
| USB | USB controller | Off |
| Sandbox | crosvm sandbox | Off |
| Huge Pages | Use huge pages (requires the HugePage module) | Off |
| Huge page preallocate mode | How huge pages are lent | Disabled / Single (lend the whole block at once) / Chunked (≤256 MiB, default) |
| Protected Mode | Gunyah protection level | Normal / Protected / No firmware protection (default) |
| Backend | Virtual Machine backend (VMM) | CrosVM (default) / QEMU |
| Virtualization | Hypervisor selection | Auto (default) / Software emulation / Linux KVM / Qualcomm Gunyah / MediaTek GenieZone |
| Debug trace | Trace the VMM process with strace; trace logs are written to the cache directory to help diagnose boot / runtime issues | Off |
| Extra options | Additional command-line arguments passed through to the VMM (one per line) | — |
Backend and Virtualization Compatibility
- QEMU supports: software emulation, KVM, Gunyah
- CrosVM supports: KVM, Gunyah, GenieZone
Saving an incompatible combination will produce an error. Generally, keeping CrosVM + Auto is fine.
Tab 2 · Boot
- Auto-start on boot: automatically launch this Virtual Machine after the device boots
- Boot method: UEFI or Linux boot protocol
UEFI Boot
Suitable for the vast majority of Linux distribution images and Windows.
- UEFI firmware path: leave empty to use the built-in EDK2 firmware; a custom firmware only takes effect with the QEMU backend (CrosVM always uses the built-in EDK2)
Linux Boot Protocol
Loads the kernel directly for booting, suitable for custom kernel scenarios. There are two kernel sources:
A. Disk image (auto-scan)
Automatically scans the selected disk for boot entries (kernel / initrd / cmdline).
| Option | Description |
|---|---|
| Boot disk | Choose which disk to scan for boot entries |
| Boot entry | Follow the bootloader automatically, or specify a particular entry |
| Rescan | Re-detect boot entries |
| vdafix (on by default) | Rewrites the root= / resume= device names to PARTUUID= to avoid device-name drift |
| cmdline override | Leave empty to use the cmdline that ships with the image |
| Boot menu wait seconds | Default 2; set to 0 to hide the menu |
B. Manual specification
| Option | Description |
|---|---|
| Kernel path | Built-in Linux kernel / system MicroDroid kernel / external file |
| initramfs path | Built-in / MicroDroid / MicroDroid debuggable / external file |
| cmdline | Default root=/dev/vda2 |
DMA Warning
In Protected Mode, if the kernel in use lacks the CONFIG_DMA_RESTRICTED_POOL option, the interface shows a DMA warning. In this case it is recommended to turn off Protected Mode or switch kernels.
Tab 3 · Display
For complete display functionality (VNC, Native Display, external screen casting) see Graphical Display. The configuration fields are as follows:
GPU
| Field | Meaning | Options |
|---|---|---|
| Enable GPU | Turn on GPU acceleration | Toggle |
| Renderer | GPU backend | 2D (software) / VirGL / GfxStream (default) |
| GPU API | Graphics API | Vulkan / EGL / OpenGL ES (default) / ANGLE |
Display
| Field | Meaning | Options / Range |
|---|---|---|
| Enable display | Enable graphical display | Toggle |
| Display backend | Framebuffer type | SimpleFB (default) / Virtio-GPU (requires GPU enabled first) |
| Enable Native Display | Only visible when GPU is on + Virtio-GPU (GfxStream) | Toggle |
| Display width | Resolution width | 320–8192, default 1280 |
| Display height | Resolution height | 320–8192, default 720 |
| Refresh rate | Hz | 1–400, default 60 |
| Horizontal / Vertical DPI | DPI (only visible when not SimpleFB) | 100–800, default 160 |
VNC
| Field | Meaning | Options |
|---|---|---|
| Enable VNC | Turn on the VNC service | Toggle |
| Host address | VNC listen address | — |
| Port | VNC port | 1024–65535 (leave empty to auto-assign) |
| Password authentication | Whether to enable a password | Toggle |
| Password | VNC password | One-click clear / generate an 8-character random password |
Tab 4 · Storage
Disk List
Each disk can be configured with:
- Path: enter manually / browse files / select a registered disk / import or create a disk
- Bus: VIRTIO / SCSI / PMEM / PFLASH / CDROM
- Read-only: whether to mount read-only
CDROM
When installing a system, you can mount the installation ISO on the CDROM bus with read-only enabled, and mount the target blank disk on the VIRTIO bus.
Shared Directory List
Share folders between the host and the Virtual Machine via VirtFS. Each entry can be configured with:
| Field | Meaning | Default / Options |
|---|---|---|
| Host directory path | The host directory to share | — |
| Tag | Mount tag; must be unique and valid | — |
| Type | Protocol | P9 / FS (virtiofs, default) |
| Cache | Cache policy | NEVER / AUTO (default) / ALWAYS |
| Writeback | writeback cache | Off |
| DAX | DAX direct access | Off |
| POSIX ACL | POSIX ACL support | On (default) |
| Timeout seconds | Metadata timeout | 5 |
Inside the Virtual Machine, mount using the corresponding tag, for example:
# virtiofs type
mount -t virtiofs <tag> /mnt/share
# 9p type
mount -t 9p -o trans=virtio <tag> /mnt/share
Tab 5 · Network
Each virtual network interface card (NIC) can be configured with:
| Field | Meaning |
|---|---|
| Network | Choose from the configured Bridge Networks |
| MAC address | Optional; can be randomly generated |
| Source MAC filtering | Requires a MAC to be configured when enabled |
| Port isolation | Isolate from other ports on the same network |
| VLAN ID | 0–4094 tagged access, 4095 = trunk, empty = trunk |
| DHCPv4 static assignment | Address offset (default 64) + Port Forwarding list |
| DHCPv6 static assignment | Address offset + Port Forwarding list |
Port forwarding format: one entry per line, [protocol] host-port:guest-port; leaving the protocol empty means tcp+udp, and range notation 8000-9000:8000-9000 is supported.
Conditions for Port Forwarding to Take Effect
Port Forwarding only works when SNAT is enabled on the network it belongs to; IPv6 Port Forwarding additionally requires the gVisor bridge.
Saving and Validation
After clicking the save button at the bottom, the system validates the configuration tab by tab. If an item is invalid (such as a duplicate name, an illegal CIDR, a tag conflict, etc.), it automatically jumps to the location of the error and shows a hint. Once validation passes, the Virtual Machine is created/updated.