
Quick Start
This section walks you through launching your first Linux Virtual Machine from scratch. You can begin once you have completed the Initial Setup.
Overview
Launching a Virtual Machine usually involves three steps:
- Prepare a disk image — download a distribution image or import an existing image
- Create the Virtual Machine — configure CPU, memory, boot, disk, display, and so on
- Start and connect a display — access it via VNC / Native Display / console
Already Have a VM Package?
If someone gave you a .vmpkg file, you can skip the setup: tap Import VM on the Home tab, pick the file, and it's ready to start. See Export & Import VM Packages.
Step 1: Prepare a Disk Image
On the main interface, switch to the Disk tab, click Add Disk, and choose one of the following ways to obtain an image:
- Download distribution image: pick Ubuntu, Debian, Arch, etc. from the built-in list, choose a mirror, and download (the simplest option)
- Import LXC image: choose distribution → version → variant, then download
- Download from URL: paste a direct link to a
.img/.qcow2file to download - Import existing file: choose a disk image file already on your phone
- Create new disk image: create a blank disk (for installing a system)
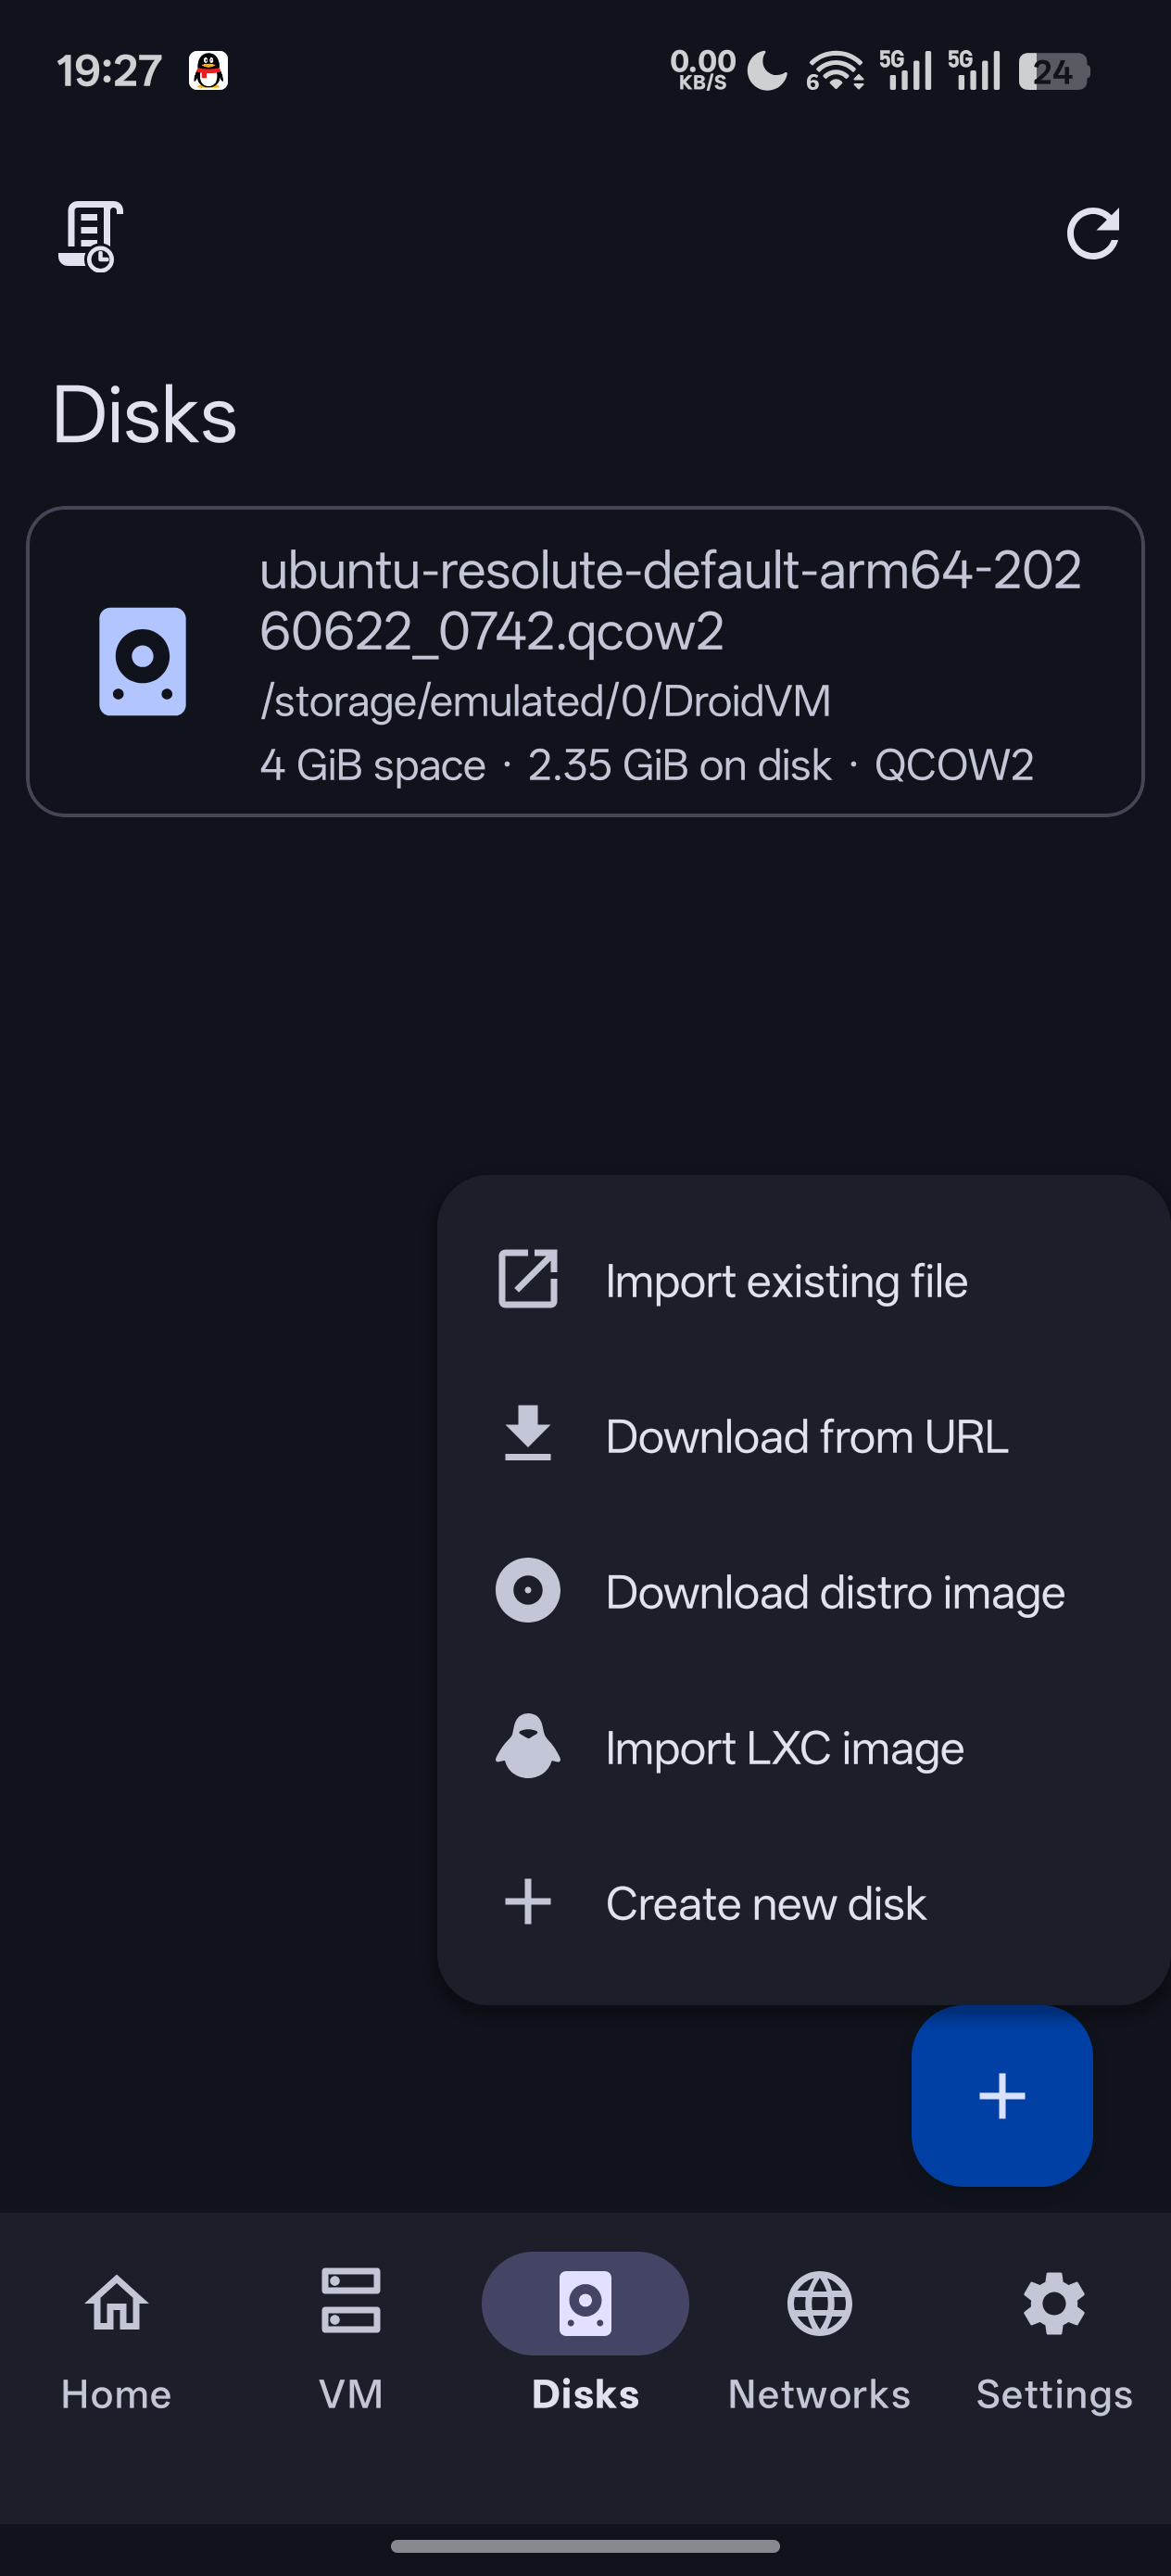
📷 Screenshot placeholder: Disk tab - the "Add Disk" menu
See Disk Management for details.
Step 2: Create the Virtual Machine
Switch to the Virtual Machine tab and click the + button in the lower-right corner to create a new Virtual Machine. The configuration interface is divided into 5 tabs:
- Basics: set the name, memory (e.g. 2048 MB), CPU count (e.g. 4), and backend (CrosVM)
- Boot: choose the boot method. Linux distribution images usually use UEFI, or choose Disk Image to auto-scan for a kernel
- Storage: add the disk image you prepared in Step 1
- Display: enabling GPU + VNC is recommended for convenient graphical access
- Network: optional; choose a configured Bridge Network to get online
After filling everything in, click the save button in the lower-right corner.
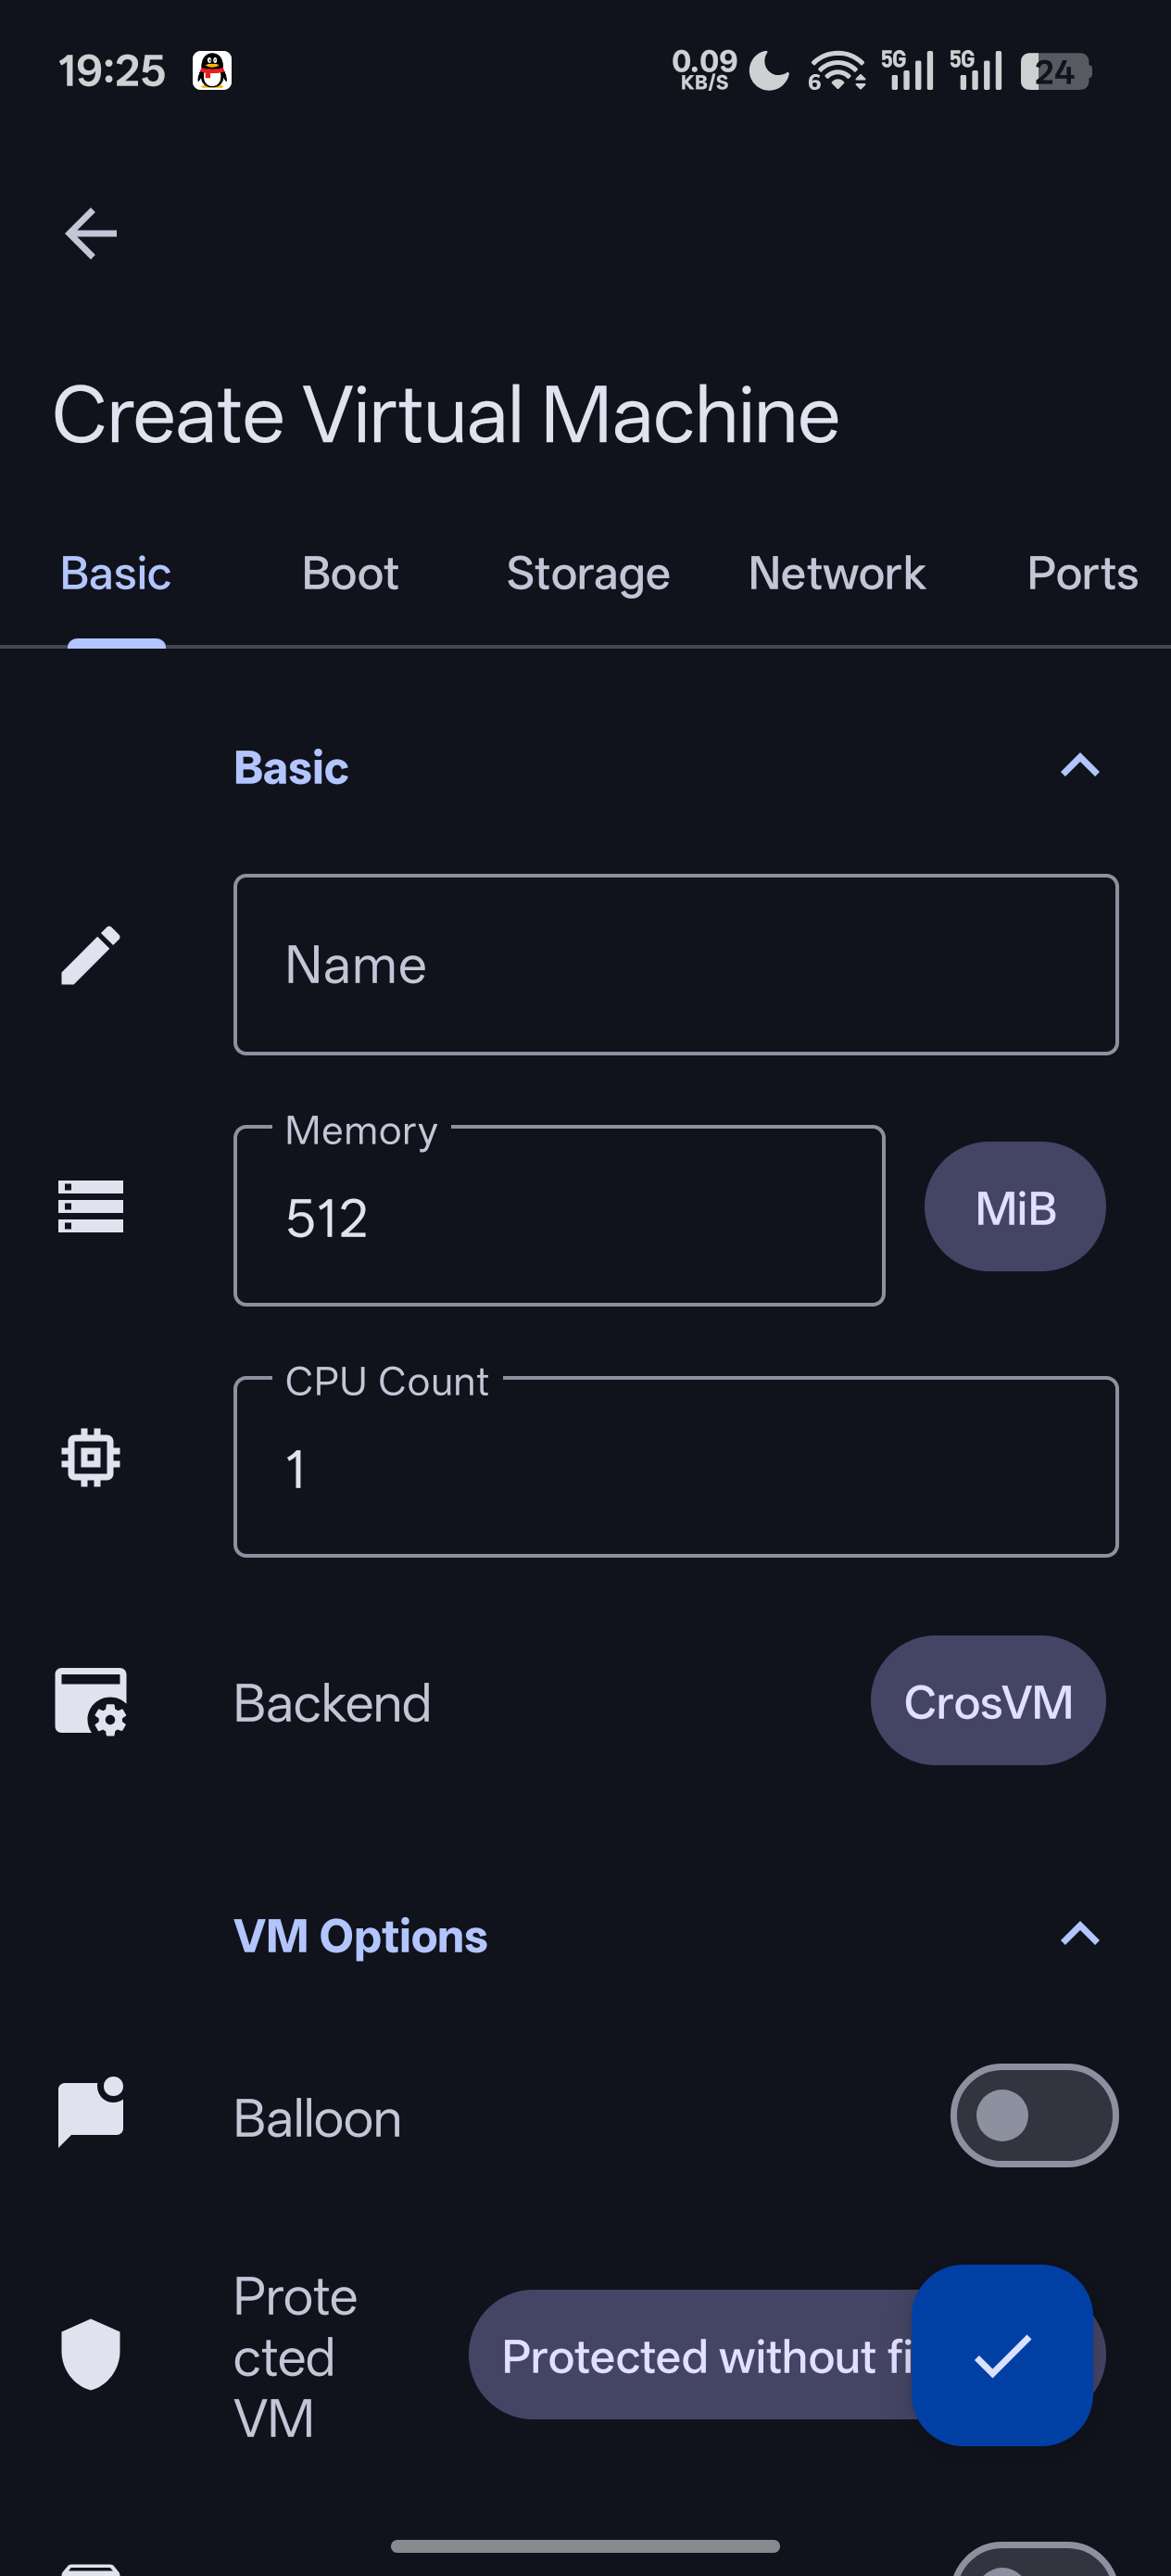
📷 Screenshot placeholder: Create Virtual Machine - Basics tab
See Creating and Editing Virtual Machines for details.
Minimal Working Configuration
- Memory: starting at 2048 MB
- CPU: 2–4
- Backend: CrosVM
- Boot: UEFI
- Display: enable GPU (GfxStream) + enable VNC
Step 3: Start and Connect
Return to the Virtual Machine list, tap the Virtual Machine you just created to open its detail page, and click Start.
After it starts, choose an access method based on your display configuration:
- VNC Display: click "Display" to view the graphical interface with the built-in VNC client
- Native Display: better performance if Native Display is enabled
- Terminal Console: click "Console" to interact with the system over the serial port (suitable for command-line-only systems or troubleshooting boot issues)
📷 Screenshot placeholder: VNC display interface
Next Steps
- Learn about all Virtual Machine configuration options
- Learn how to manage and control Virtual Machines
- Configure a virtual Bridge Network for connectivity and Port Forwarding
- Set up a Shared Directory to transfer files between the phone and the Virtual Machine